Description
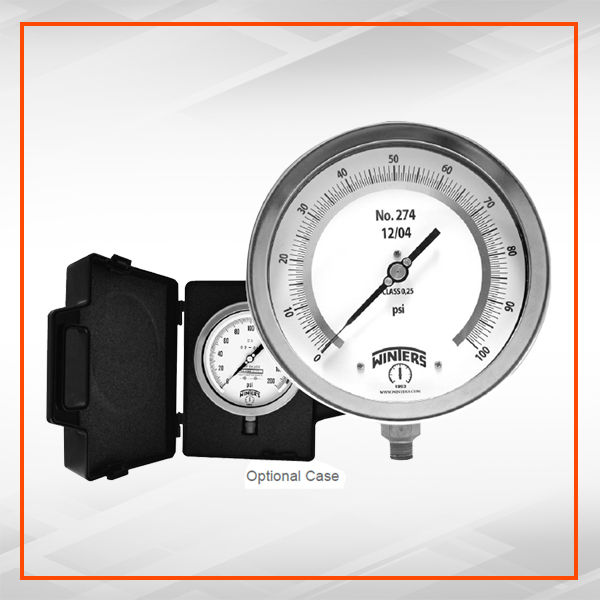
• Highly accurate: ±0.25% for 6” (150mm), ±0.50% for 4” (100mm) complete with calibration certificate traceable to NIST standards
• Mirrored anti-parallax dial
• Knife-edge pointer
• Protective carrying and storage case available
• ASME B40.100 compliant
• CRN registered
Applications:
• Designed to be used where accuracy and repeatability are of prime importance
• Used in laboratories and instrument testing facilities
Dial
●4” (100mm),
●6” (150mm) white aluminum with black markings
Both dials have mirror band for precise instrument readings
Case
●AISI 304 SS
Lens
●Polycarbonate
Ring
●AISI 304 SS
Socket
●4” (100mm): Brass
●6” (150mm): 316 SS
Connection
●1/4” NPT or 1/2” PT standard, bottom
Bourdon Tube
●4” (100mm): Phosphor bronze
●6” (150mm): 316 SS
Movement
●4” (100mm): Brass
●6” (150mm): AISI 304 SS temperature compensated
Pointer
●Aluminum, anodized black, micrometer adjustable, knife-edge
Welding
●Silver alloy (TIG for 316 SS wetted parts)
Over-pressure Limit
●30% of full scale value
Working Pressure
●Maximum 75% of full scale value
Calibration Conditions
●68°F (±5.4°F), 20°C (±3°C) for ambient and process temperatures at atmospheric pressure
Ambient/Process Temperature
●-4°F to 150°F (-20°C to 65°C)
Accuracy
●4” (100mm): ±0.5% ANSI/ASME Grade 2A
●6” (150mm): ±0.25% ANSI/ASME Grade 3A
Enclosure Rating
●IP65
